What is ThriveCart Learn and Learn Plus?
ThriveCart Learn is a Learning Management System (LMS) that is used as the home for your online course content, memberships, coaching programs, and digital products. It is the perfect platform for a coach or online course creator.
How do I Get Access to the ThriveCart Learn Course Platform?
ThriveCart Learn is a really powerful Learning Management System that is included for free to all ThriveCart users, one of the best-in-class checkout platforms.
You can get a copy of ThriveCart for a one-time payment here.
Accessing ThriveCart Learn
The ThriveCart Learn platform is easily accessible from inside your ThriveCart account dashboard.

Across the top of the screen, there are four tabs: My courses, My bundles, My students, and My team. This is the main navigation inside the platform. The My courses and My student areas are where you will spend most of your time. The My students area is where you can import students, add, edit and manage student access to your online courses.
Once inside the Learn platform, you will notice things are organized in a hierarchy of projects and courses. Think of a project as a folder, and the courses sit inside the folder. For example, you could create a members area (folder) with multiple workshops, and pieces of training (courses) inside.
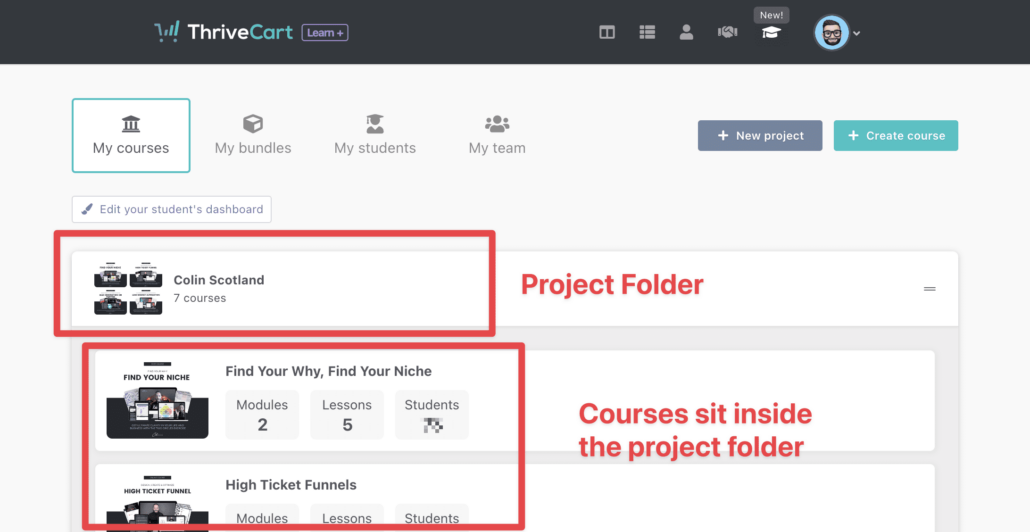
Create A Project
The first step is to create a new project folder where your online courses will live.
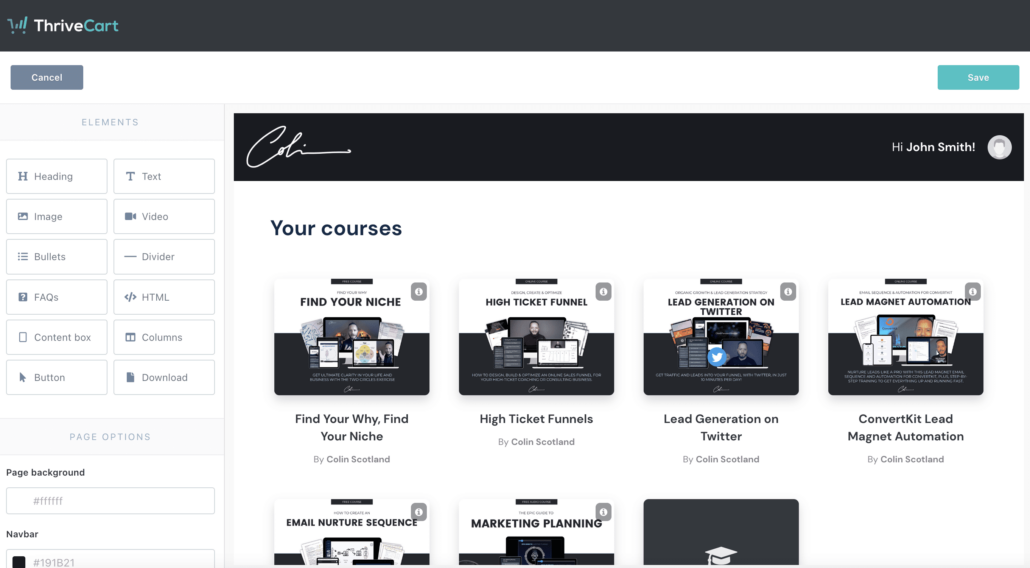
Edit your student dashboard
Next, edit your student dashboard to customize the look and feel of the dashboard. This is the course area where your students access all of the courses they have signed up for and other courses that are available.
Change the colors and add text and other elements to create an engaging courses overview screen for your students.
Create your first online course
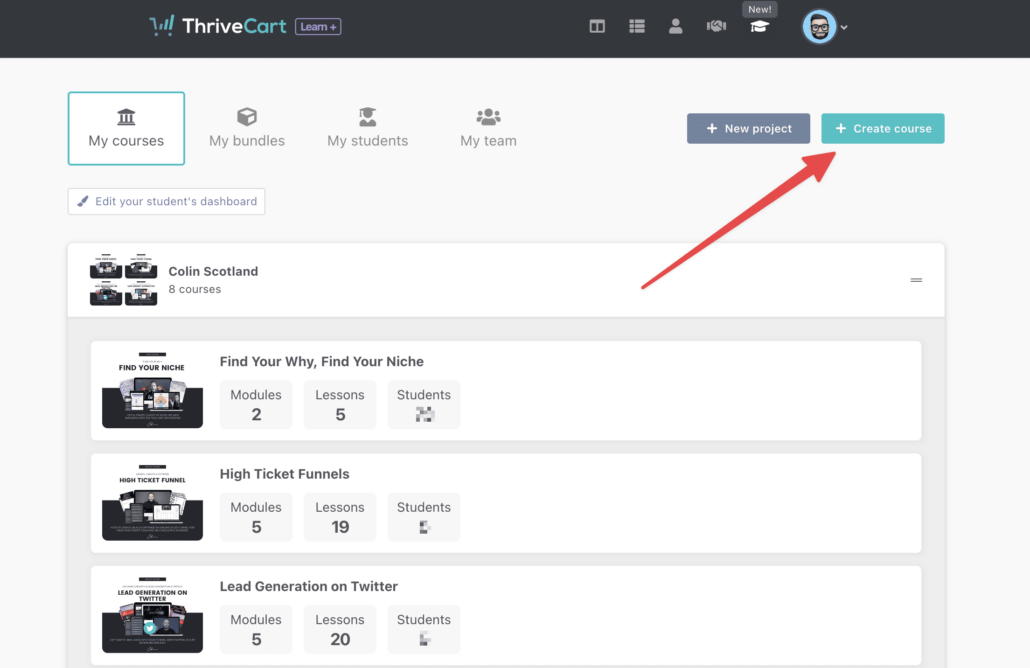
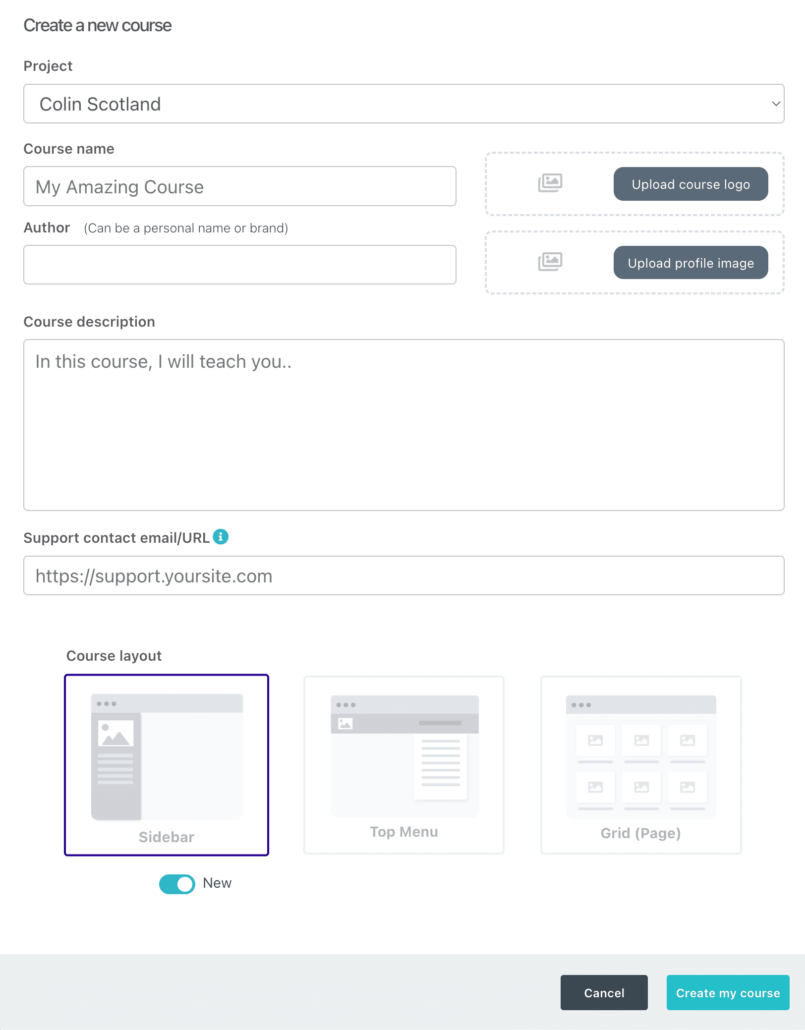
Click the 'Create Course' button to create a course. Here, you will provide some essential information:
- Course name
- Author
- Course logo
- Author picture
- Course description
- Support email or URL
- Choose a layout
Add Your Modules and Lessons
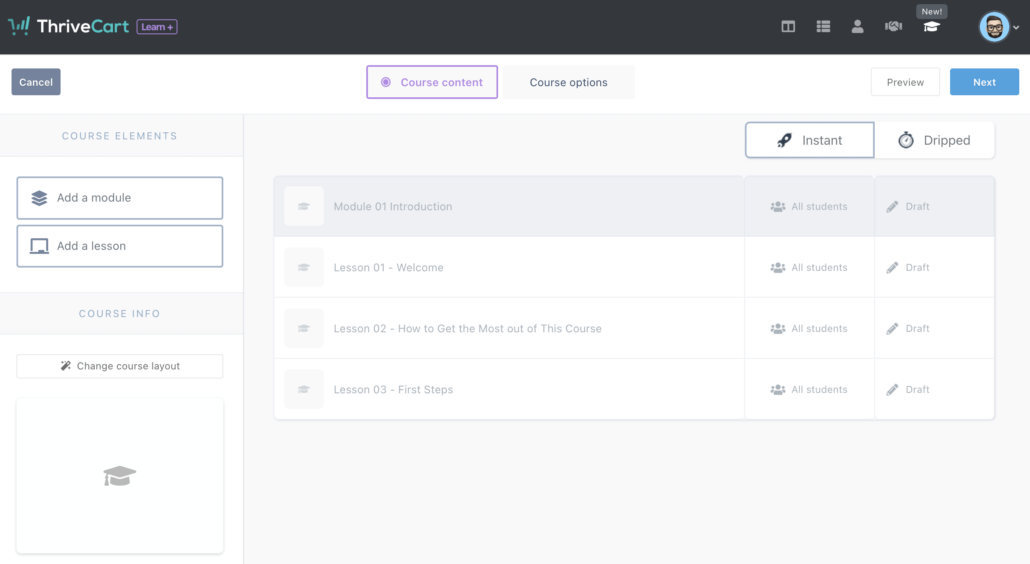
Once your course is created, the next step is to add your first module and lessons. Modules and lessons are a simple hierarchical structure, similar to how projects and courses work.
The module is the parent, the lessons sit inside the module. For example, the structure could look something like this:
- Module 1 Introduction and Overview of the Course
- Lesson 1 - Welcome
- Lesson 2 - Getting Started
- Lesson 3 - How to Get the Most Out of This Course
Dripping Content versus Instant Access Lessons
ThriveCart Learn allows you to very easily drip out your course content, which is perfect for cohort-based courses, challenges, and progressive courses. Alternatively, you can choose to provide instant access. Using the optional Learn+ upgrade to create advanced sequences, and trigger email campaigns the learning pathways you can create for your students really are endless.
Edit Your Online Course Layout
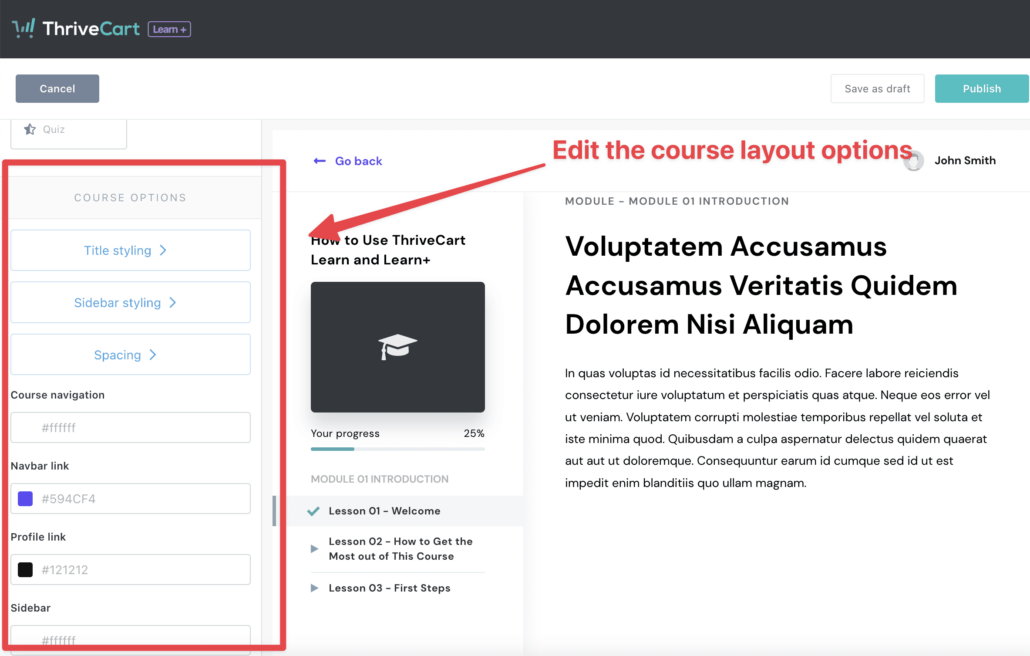
Once you have added your first lessons, it is a good idea to edit how your course will look at this point.
Edit a lesson and down the left-hand side, you will see options to adjust the look and feel of the course here.
Edit Your Lessons and Add Lesson Content
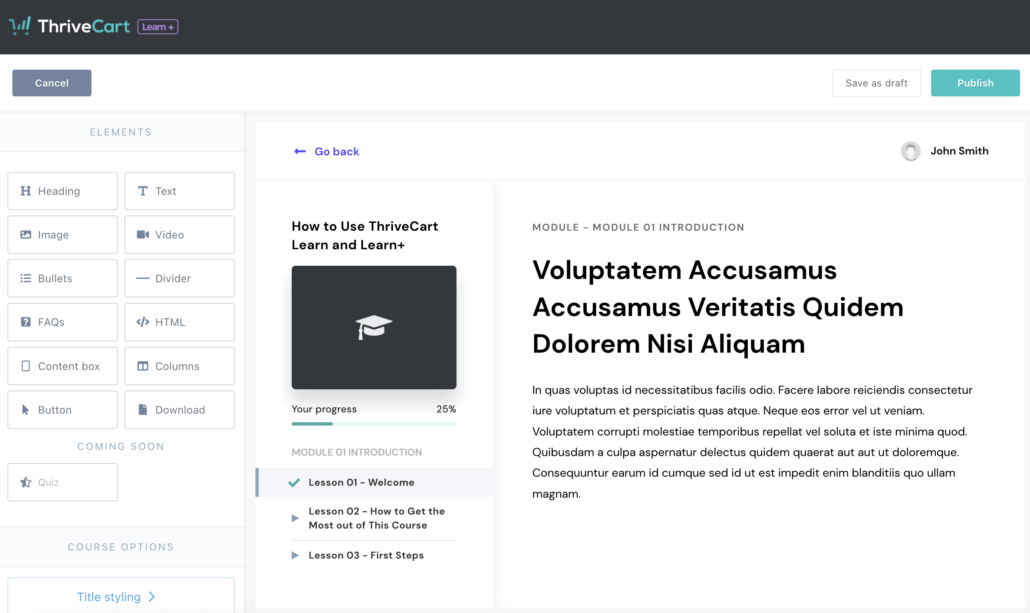
In the lesson editor, you will see content blocks on the left-hand side, these can be dragged and dropped into the lesson itself. This is where you build the lesson content. Add in text, videos, links to worksheets, etc. as needed.
Videos in ThriveCart Learn and Learn+
One thing to note about ThriveCart Learn and Learn+ is that video or file hosting is not included. This means you will need to host your videos in an external service, such as YouTube or Vimeo, and your files (worksheets, PDFs, learning resources, etc) in a cloud storage platform such as Google Drive.
It is really easy to add share links to buttons and embedding videos from either YouTube or Vimeo onto the lesson page is just a case of copying and pasting the embed code.
Edit The Course Options
Once you have added your lesson content and adjusted the layout, the next step is to edit the course options.
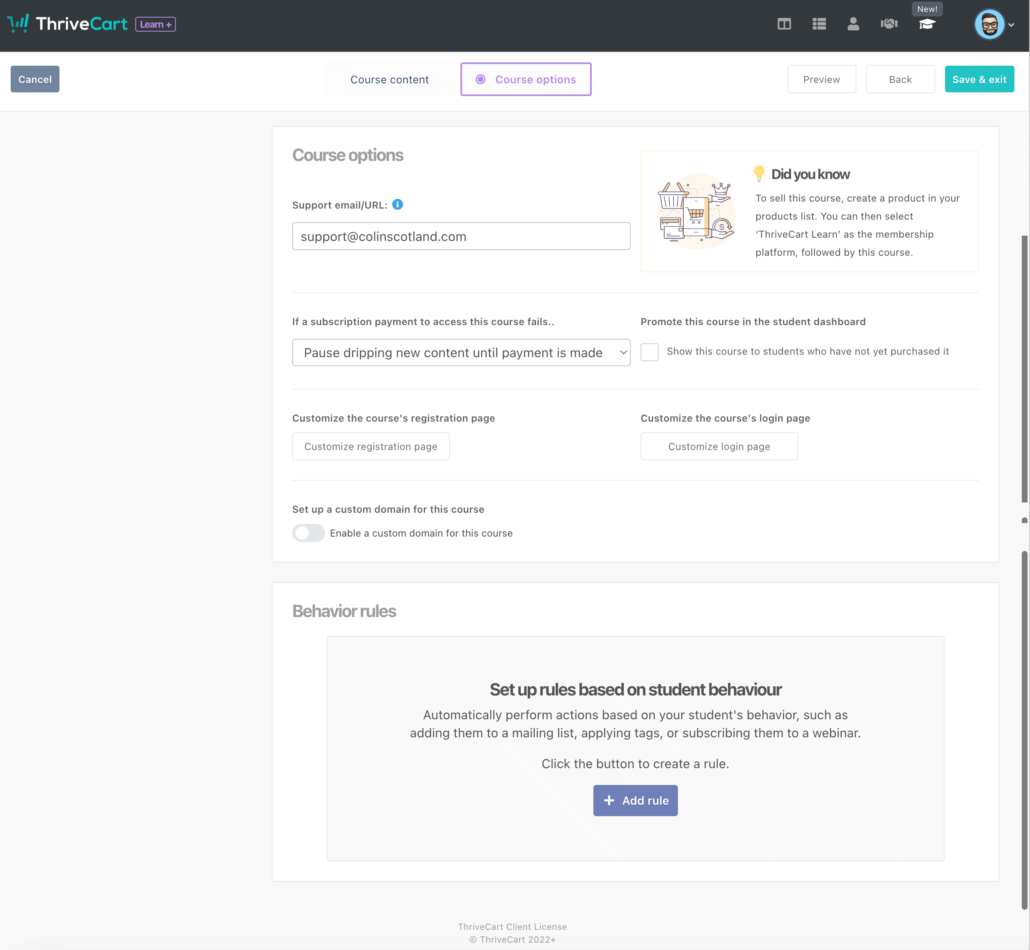
You can edit the style and content of both the registration page and the student login page. This is handy for adding in your own logo, color scheme, etc.
ThriveCart Learn also has a nifty feature that allows you to show students courses they are not yet enrolled in inside the student dashboard. The setting in the course options window allows you to redirect people to either a sales page or a checkout page directly. This feature is great for encouraging cross-selling.
Create a ThriveCart Checkout Page to Sell Your Course
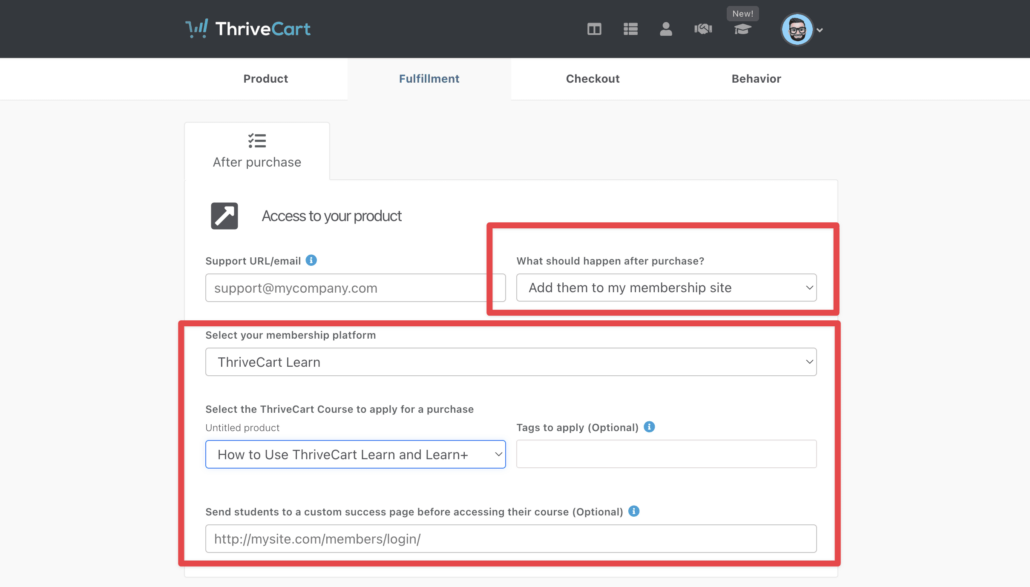
In ThriveCart you can either give access to the course when someone purchases one of your offers, or you can create a dedicated checkout page for your online course.
Here is an example of a conversion-optimized checkout page for one of my courses for reference.
In the Fulfillment tab of your ThriveCart product, you can give access to your courses or members area.
Publish Your Course
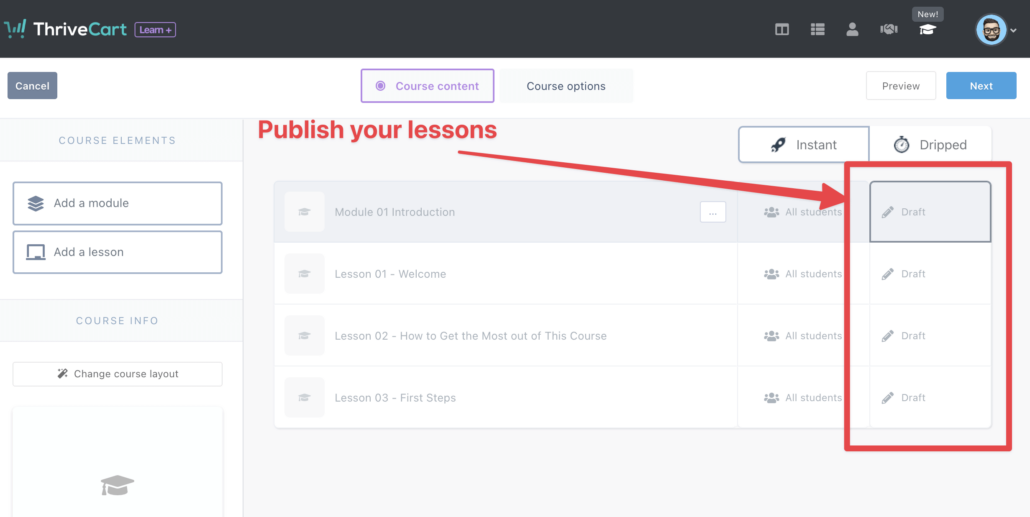
The final step is to publish the lessons in your course, then you are ready for students. Congratulations 🥳.
Here is a detailed overview of the Learn and Learn+ platforms for further reference.
Happy course creating 🙂

